WebDAV Drive Sample for macOS in .NET, C#
This sample implements a virtual file system for macOS that displays documents from a WebDAV server. You can edit documents, upload and download documents as well as manage folders structure using macOS Finder. This sample supports synchronization, on-demand loading and selective offline files support. It synchronizes files and folders both from a WebDAV server to the local user file system and from the local user file system to the WebDAV server. This sample is written in .NET, C#.
You can use this sample out-of-the-box to manage documents on a WebDAV server, or you can use it as a starting point for your custom virtual drive to create OneDrive-like features for your DMS/CRM/ERP and reprogram it to publish data from your storage.
This sample is supplied as part of the SDK with IT Hit WebDAV Client Library for .NET and with IT Hit User File System.
You can download this sample and trial licenses in the IT Hit WebDAV Client Library product download area and in the IT Hit User File System product download area. You can also clone it or browse the code on GitHub.
This sample is provided with IT Hit User File System v6.2 and later versions.
Requirements
- .NET 7
- Xcode 14.3+
- Visual Studio Community 2022 for Mac, Stable Channel.
Server Requirements
This sample requires WebDAV server with collections synchronization support. The following samples support collections synchronization:
- FileSystemSynchronization sample supplied with IT Hit WebDAV Server Engine for .NET.
- collectionsync sample supplied with IT Hit WebDAV Server Library for Java.
You can also test this sample with IT Hit demo servers:
Solution Structure
The macOS sample solution consists of 3 projects: container application, an extension project, and a common code.
The container application provides a Menu Bar icon to install/uninstall the file system extension.
The extension project runs in the background and implements a virtual file system on macOS (File Provider). It processes requests from macOS applications sent via macOS file system API and lists folders content. The macOS extension can be installed only as part of a container application, you can not install the extension application separately.
Setting License
Note that to use the sample you need both the IT Hit WebDAV Client Library license and IT Hit User File System license.
To run the example, you will need both IT Hit WebDAV Client Library for .NET license and IT Hit User File System Engine for .NET License. You can download a WebDAV Client for .NET trial license in the IT Hit WebDAV Client Library product download area and the User File System trial license in the IT Hit User File System product download area. Note that this sample is fully functional with a trial licenses and does not have any limitations. The trial licenses are valid for one month will stop working after this. You can check the expiration date inside the license file. Download the license files and specify license strings in the WebDAVClientLicense and UserFileSystemLicense fields respectively in WebDAVMacApp\Resources\appsettings.json file. Set the license content directly as a value (NOT as a path to the license file). Do not forget to escape quotes: \":
"UserFileSystemLicense": "<?xml version=\"1.0\" encoding=\"utf-8\"?><License…
You can also run the sample without explicitly specifying a license for 5 days. In this case, the Engine will automatically request the trial licenses from the IT Hit website https://www.userfilesystem.com. Make sure it is accessible via firewalls if any. After 5 days the Engine will stop working. To extend the trial period you will need to download trial licenses and specify them in appsettings.json
Setting WebDAV Server URL
To specify the WebDAV server URL edit the "WebDAVServerUrl" parameter in appsettings.json. This could be either a server root path (https://server/) or a WebDAV folder on your server (https://server/dav/).
For testing and demo purposes you can use one of the IT Hit demo servers. Navigate to https://webdavserver.net or to https://webdavserver.com in a web browser. Copy the URL or your test folder, that looks like https://webdavserver.net/User123456/ and specify it in the WebDAVServerUrl parameter.
"WebDAVServerUrl": "https://webdavserver.net/User123456",
Setting Web Sockets Server URL
The client application receives notifications from server about changes via web sockets. To specify your web sockets server URL edit the "WebSocketServerUrl" parameter in appsettings.json.
In case you are using IT Hit demo servers, you will specify the demo server root, without user folder: wss://webdavserver.net or wss://webdavserver.com.
"WebSocketServerUrl": "wss://webdavserver.net"
Running the Sample
Note that this sample does NOT require Group ID, App Identifies and Provisioning Profiles configuration for development. It is required only required for production deployment.
To run the sample:
- Open the project in Visual Studio and run the project. The application is added to the macOS Status Bar.
- Select 'Install Extension' command in the Status Bar. This will mount your WebDAV file system.
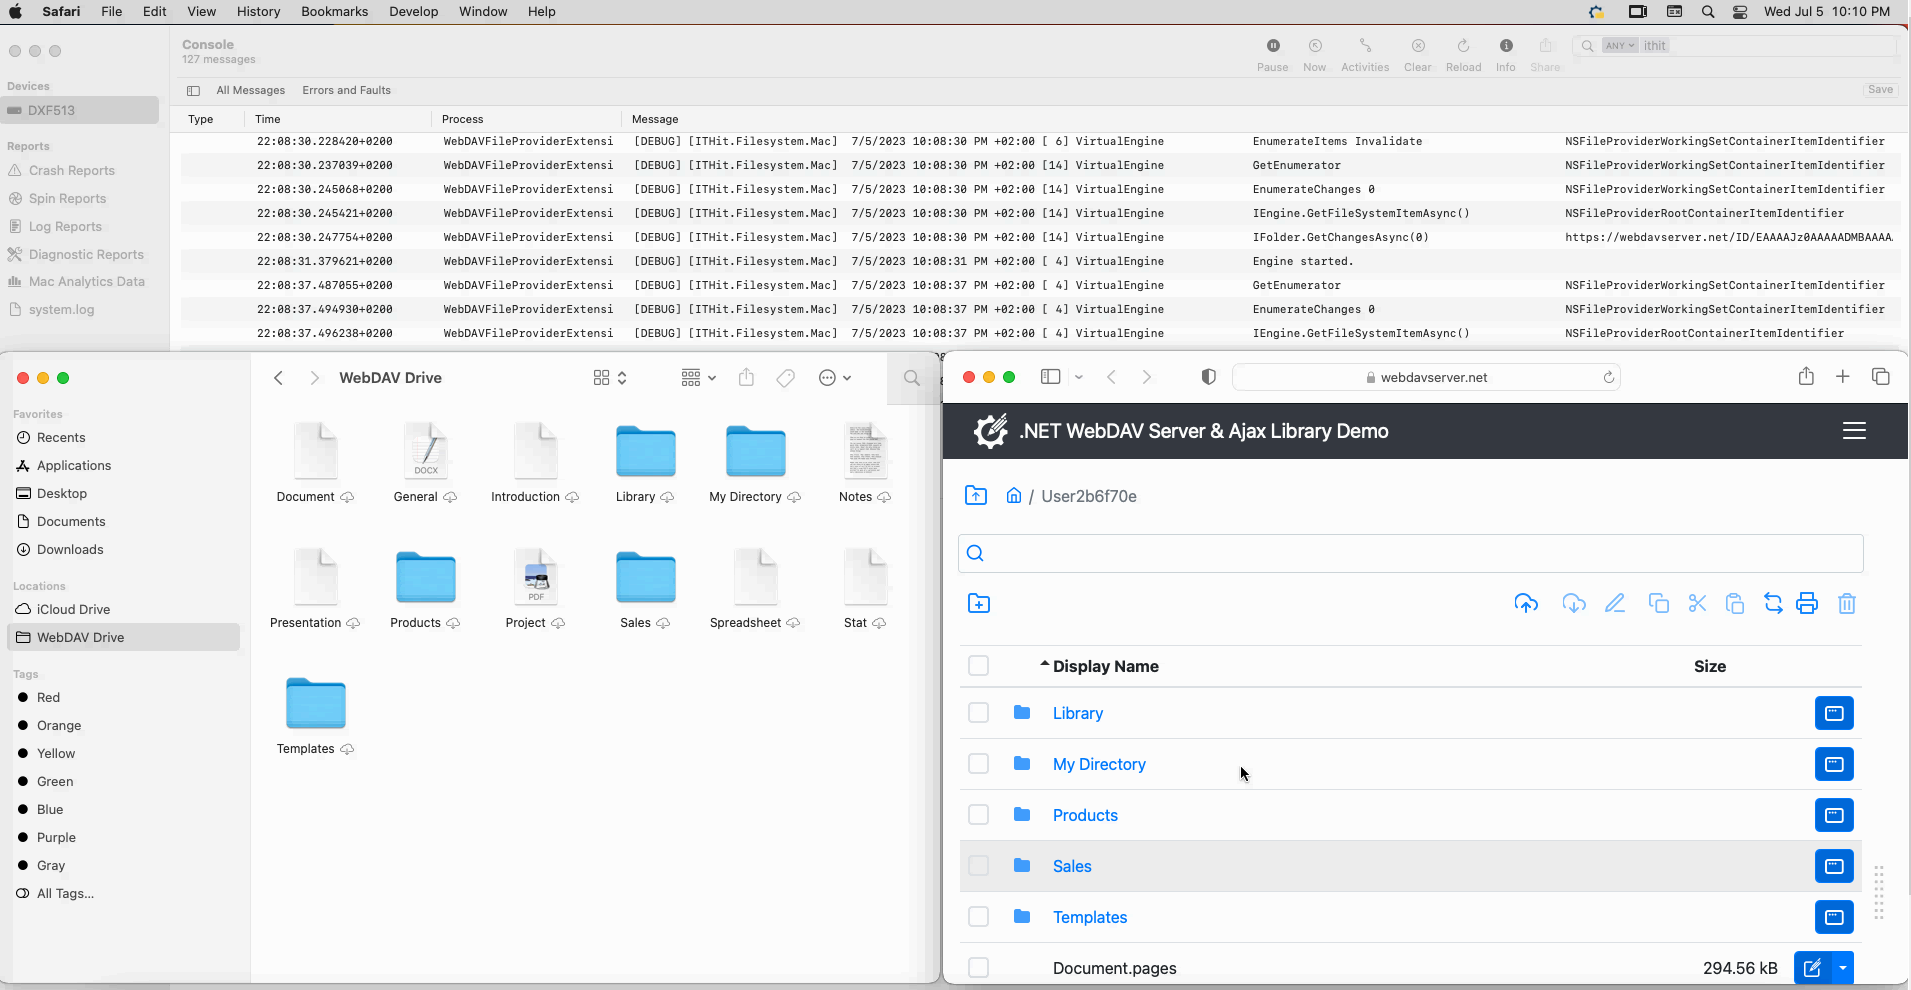
Now you can manage documents using Finder, command prompt or by any other means. You can find the new file system in the 'Locations' sections in Finder.
For the development and testing convenience, when installing the extension, it will automatically open an instance of Finder with a mounted file system as well as will launch a default web browser navigating to the WebDAV server URL specified in your appsettings.json:
Packaging the Sample
To create installer for testing purposes and install the sample to /Application folder follow this steps:
- You need Mac Developer certificate to sign app and 3rd Party Mac Developer Installer certificate to sign pkg. To get them use this guide.
- Start Release build.
- Then open Release output folder and find WebDAV Drive signed.pkg and use this pkg to install the Sample on the same host.
For production environment you need to create Group ID, App Identifies and Provisioning Profiles configuration as described in this article.