Creating Virtual File System in .NET for Windows
This article describes specific steps required to implement and run the IT Hit User File System on Windows. You can find how to implement the cress-platform Engine interfaces in the Creating Virtual File System in .NET article.
Creating a .NET Project
Create a .NET console application. In this article, we will use the .NET 6 as a target framework.
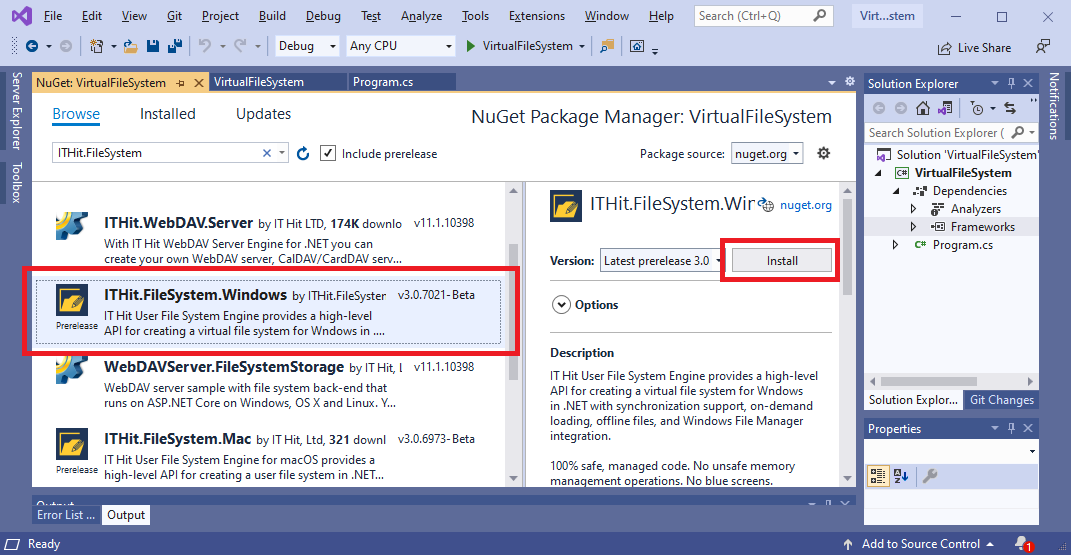
Add an ITHit.FileSystem.Windows module reference to your project. In Visual Studio you can do this via the Project->Manage NuGet Packages menu:
The IT Hit User File System on Windows requires Windows Runtime API support. To be able to use it we will set the target framework moniker in the project file. Open the project file and change the TargetFramework element:
<Project Sdk="Microsoft.NET.Sdk">
  <PropertyGroup>
    <OutputType>Exe</OutputType>
    <TargetFramework>net6.0-windows10.0.19041.0</TargetFramework>
  </PropertyGroup>
  ...
</Project>
You can find more framework monikers for other Windows versions in the Call Windows Runtime APIs in desktop apps article.
Registering Virtual File System
To inform the Windows platform about a new virtual file system and to receive file system API calls you must register a new file system (register a sync root in terms of Windows Cloud Files API). Typically you will do this during your application's first start. You can also do this during the installation process if you are using a regular .msi installer. To register you will use the StorageProviderSyncRootManager class. Create a Registrar class and add it to your project:
public static class Registrar
{
    /// <summary>
    /// Registers sync root.
    /// </summary>
    /// <param name="syncRootId">ID of the sync root.</param>
    /// <param name="path">A root folder of your user file system.</param>
    /// <param name="displayName">Human readable display name.</param>
    /// <remarks>Call this method during application installation.</remarks>
    public async Task RegisterAsync(string syncRootId, string path, string displayName)
    {
        StorageProviderSyncRootInfo storageInfo = new StorageProviderSyncRootInfo();
        storageInfo.Path = await StorageFolder.GetFolderFromPathAsync(path);
        storageInfo.Id = syncRootId;
        storageInfo.DisplayNameResource = displayName;
        storageInfo.IconResource = @"C:\Proj\Icons\Drive.ico";
        storageInfo.Version = "1.0";
        storageInfo.RecycleBinUri = new Uri("https://userfilesystem.com/recyclebin");
        storageInfo.Context = CryptographicBuffer.ConvertStringToBinary(
        path, BinaryStringEncoding.Utf8);

        storageInfo.HydrationPolicy = StorageProviderHydrationPolicy.Progressive;
        storageInfo.HydrationPolicyModifier =
                StorageProviderHydrationPolicyModifier.AutoDehydrationAllowed;

        // To support on-demand population set this property to 'Full'.
        storageInfo.PopulationPolicy = StorageProviderPopulationPolicy.Full;

        // This configures when PlaceholderItem.GetInSync() should return true/false.
        storageInfo.InSyncPolicy = StorageProviderInSyncPolicy.Default;

        StorageProviderSyncRootManager.Register(storageInfo);
    }

    public static async Task UnregisterAsync(string syncRootId)
    {
        StorageProviderSyncRootManager.Unregister(syncRootId);
    }
}
Note that if you have any regular files and folders under your virtual file system root during registration, by default, they will be considered 'New'. When you start the Engine such files will be automatically converted into placeholders and synced to your remote storage.
Unregistering the Virtual File System
To unregister the virtual file system you will call the StorageProviderSyncRootManager.Unregister() method passing the sync root ID specified during registration.
Note that you need to unregister the virtual file system only in case you create a regular .msi installer. In case you are creating a packaged installer, you do NOT need to unregister the sync root (and you can not do it because the package does not provide any uninstall events/hooks). The package will automatically delete the sync root registration on uninstall. The package will also automatically delete all folders created by your application, such as your sync root folder, you do not need to delete them manually.
On Windows, in addition to unregistering the virtual file system, you will also delete any data stored by the Engine. To do this remove all data stored under the folder returned by the EngineWindows.DataPath property. Again, removing this data is required only in case you are creating a regular .msi installer. In the case of a packaged installer, you do NOT need to remove it, all temporary data will be deleted automatically.
Starting the Engine
To start processing file system calls create a VirtualEngine class instance and call the IEngine.StartAsync() method. Below is an example of your Main() application method. For the sake of simplicity, in this example, we will register the virtual file system on application start and unregister on exit.
static async Task Main(string[] args)
{
    // Note that your root file system path must be indexed.
    string userFileSystemRootPath = @"C:\Users\User1\VFS\";

    // Register file system.
    Directory.CreateDirectory(userFileSystemRootPath);
    await Registrar.RegisterAsync(SyncRootId, userFileSystemRootPath, "VFS");

    using (var engine = new VirtualEngine(license, userFileSystemRootPath))
    {
        // Set remote storage root item ID.
        byte[] itemId = WindowsFileSystemItem.GetItemIdByPath(@"C:\RemoteStorage\");
        engine.Placeholders.GetRootItem().SetRemoteStorageItemId(itemId);

        // Start processing OS file system calls.
        await engine.StartAsync();

        // Keep this application running until user input.
        Console.ReadKey();
    }

    // Unregister during programm uninstall and delete all files/folder.
    await Registrar.UnregisterAsync(SyncRootId);
    Directory.Delete(userFileSystemRootPath, true);
}

// SyncRoot ID must be in the form: [Storage Provider ID]![Windows SID]![Account ID]
private static string SyncRootId
{
    get { return $"VirtualFileSystem!{WindowsIdentity.GetCurrent().User}!User"; }
}
When the Engine starts, it finds all files that were created, updated, moved, and deleted in the virtual file system when the engine was not running and calls IFile and IFolder intarface methods. It also hydrates all pinned files and dehydrates unpinned files. For example, if you are starting the Engine for the first time and there were any files or folders they will be considered new and will be synced to your remote storage by calling IFolder.CreateFileAsync() and IFolder.CreateFolderAsync().
If you do not want to process changes, pass false as a parameter to the StartAsync() method. See the User File System to Remote Storage Synchronization section for more details.
User File System Path
Unlike on other platforms, Windows provides item path in user file system in all operations. You can get the file path from context passed to IEngine.GetFileSystemItemAsync() method. You will need to cast the context to IContextWindows and get the Path property.
Setting the Result of the Operation
In most cases, if the create, write, move or delete operation completes successfully you would want the item to be marked as in-sync. You can also explicitly set the result of the operation, without throwing any exception. To explicitly set the result, each method that modifies the remote storage provides the IInSyncResultContext interface passed as a parameter. To set the result of the operation you can set the IInSyncResultContext.SetInSync property:
public async Task<byte[]> CreateFileAsync(
IFileMetadata fileMetadata,
Stream content = null,
IInSyncResultContext inSyncResultContext = null,
CancellationToken cancellationToken = default)
{
    if( /* server unavailable */ )
    {
        inSyncResultContext.SetInSync = false;
        return null;
    }
    ...
}
The SetInSync property is set to true by default before calling each method. Setting the IInSyncResultContext.SetInSync property is identical to throwing an exception inside your method implementation.
The result context parameter that implements the IInSyncResultContext interface is passed to the following methods: Folder.CreateFileAsync(), IFolder.CreateFolderAsync(), IFile.WriteAsync(), IFolder.WriteAsync(), IFileSystemItem.MoveToAsync(), and IFileSystemItem.DeleteAsync().
To process all items that failed to create, write, move or delete you can call the IServerCollectionNotifications.ProcessChangesAsync method. See the User File System to Remote Storage Synchronization section below.
User File System to Remote Storage Synchronization
Because changes made in the user file system may not sync to the remote storage (because the file was blocked, the server was unavailable, authentication failure or any errors occurred), the Engine on Windows platform needs to periodically verify files status and sync changes to the remote storage as well as hydrate files marked for hydration.
The Engine on Windows platform provides SyncService class for this purpose, available via EngineWindows.SyncService property. To start the synchronization call the SyncService.StartAsync() method. This method finds all files that were created, updated, moved, and deleted in the virtual file system and synchs them to the remote storage. It also hydrates all pinned files (marked with the "Keep on this device" menu) and dehydrates unpinned files (marked with the "Free up space." menu).
Typically you will call the SyncService.StartAsync() method after restoring connection to server or authentication events, to process all changes that we were made while your client was offline.
The SyncService.StartAsync() method is also automatically called when you start the Engine with IEngine.StartAsync() method. If you do not want to start incoming and outgoing synchronization on Engine start, pass false to StartAsync() method.
To set the interval for synchronization, set the SyncService.SyncIntervalMs property.
Operations Timeout
On Windows, the following methods have a 60 sec timeout: IFolder.GetChildrenAsync() , IFile.ReadAsync() , IFileSystemItem.DeleteAsync() , IFileSystemItem.MoveToAsync(). To reset the timput you can call the IResultContext.ReportProgress() method. However, in case of the IFolder.GetChildrenAsync() method it will only reset the timer, the ReportProgress() call has no impact on progress display in Windows File Manager.
Inside the IFolder.GetChildrenAsync() method the IFolderListingResultContext.ReturnChildren() call will also reset the timeout.
In the IFile.ReadAsync() method the timeout is reset each time you write data to the output stream. However, the timeout is reset only if the stream is advanced by 4K or more. Otherwise, the content is buffered and the stream waits for more data to be written.
Incoming Synchronization
On Windows, the Engine provides two approaches to remote storage to user file system synchronization. In addition to the cross-platform approach to synchronization based on Sync ID, described in Incoming Synchronization article, on Windows platform you can also update each item individually. Below we will show how to do this for new items, updated, deleted, and moved items.
To create files and folders in the user file system you will call the IServerNotifications.CreateAsync() method passing the list of items metadata to be created:
IFileSystemItemMetadata item = Mapping.GetUserFileSysteItemMetadata("/Folder/file.ext");
IServerNotifications sn = engine.ServerNotifications(@"C:\Users\User1\VFS\Folder\");
if (await sn.CreateAsync(new[] { item }) > 0)
{
    LogMessage($"Created succesefully");
}
In case the parent folder placeholder does not exist or is offline the IServerNotifications.CreateAsync() call will not create any items and will return 0.
To update a file or folder, call the IServerNotifications.UpdateAsync() method:
IFileSystemItemMetadata item = Mapping.GetUserFileSysteItemMetadata("/file.ext");
IServerNotifications sn = engine.ServerNotifications(@"C:\Users\User1\VFS\file.ext");
if (await sn.UpdateAsync(item))
{
    LogMessage("Updated succesefully");
}
To delete a file or folder call the IServerNotifications.DeleteAsync() method:
IServerNotifications sn = engine.ServerNotifications(@"C:\Users\User1\VFS\file.ext");
if (await sn.DeleteAsync())
{
    LogMessage("Deleted succesefully");
}
To move or rename a file or folder call IServerNotifications.MoveToAsync() method:
IServerNotifications sn = engine.ServerNotifications(@"C:\Users\User1\VFS\file.ext");
if (await sn.MoveToAsync(@"C:\Users\User1\VFS\Folder\file.ext"))
{
    LogMessage("Renamed or moved succesefully");
}
Because of the on-demand population, the folder placeholder, in which new items are created, or the placeholder that is being updated, deleted, or moved, may not exist in the user file system or maybe offline. In this case, the changes made via CreateAsync()/UpdateAsync()/DeleteAsync()/MoveToAsync() are ignored and the method call returns a value indicating that no changes were applied. Typically this return value is useful for logging and testing purposes.